Module tf.about.datasharing
Data sharing express guide
TF is an analytical tool to process corpus data. But it can also help you to transform the insights gained into new data: new features, that you can save in TF format and share with others.
TF supports the flow of creating research data, packaging it, distributing it, and importing in apps.
Zipping your new data
There is a command
tf-zip
to make a distribution of your own features.
For an example of all the steps of data sharing, see the share tutorial.
Using new data
The tf command has several optional command-line arguments:
--mod=...
By means of these arguments you can load extra features, either from your own system, or from GitHub / GitLab:
tf bhsa --mod=etcbc/valence/tf
or, if the module resides at a different back-end than the main data:
tf bhsa --mod=<gitlab>yourgroup/yourrepo/tf
See the incantation in tf.about.usefunc.
Using old data and apps
It is even possible to go back to earlier versions of the data and apps, which might be needed if you want to reproduce results obtained with those versions.
For app and data, you can add specifiers to point to a specific release or commit.
Read more about your data life-cycle under use data.
Custom sets
You can create custom sets of nodes, give them a name, and use those names in search templates. The TF browser can import those sets, so that you can use such queries in the browser too.
tf appname --sets=filePath
Read more in tf.about.browser.
Data sharing in depth
Assumptions
The data sharing workflow is built around the following assumptions:
- main corpus
- You work with a main corpus (it is not necessary anymore that a corpus app exists for the main corpus). The TF features of the corpus must be versioned, i.e. they must sit in a subdirectory named after the version.
- versioned TF data
- The data you share consists of a set of TF features, tied to a specific version of the main corpus, preferably the most recent version. The new features must sit in a directory named after the version of the main corpus they correspond to.
- local GitHub or GitLab
-
The data you share must reside in a directory on your hard drive. The convention is, that you have a directory
githuband orgitlabunder your home directory. And inside that you have directories for organizations or people first, and then repositories, exactly as the online GitHub / GitLab is organized.Your own data should be in such a repo as well, e.g.
ch-jensen/participants/actor/tfor
ETCBC/lingo/heads/tfor
annotation/banks/sim/tf - synchronized with the back-end
-
You must have your local repo contents synchronized with that on the GitHub / GitLab back-end.
Now other people can use your data. Whenever you push updates, users may fetch the updated data, depending on how they call up your data, see below.
- released on GitHub / GitLab
-
If your data is reasonably stable, consider making an official release on GitHub / GitLab.
Zip the data
Attach your features as a zip file to that release. TF has a command to produce a zip file with exactly the right structure and name.
This is especially useful for GitHub, where it speeds up the download process for your data users. On GitLab it does not make a difference, and you can safely omit this step.
Consider to connect your repo with Zenodo. Then every time to make a release, your repo will be archived for the long term, and you get a DOI pointing to the released version.
- get data
-
In order to get data, the only thing TF needs to know, is a string with the organization or person, the repository, and the path within the repository up to the parent of the subdirectories corresponding corresponding to the versions of the features.
Module specs do not contain versions
In the
bhsarepository if theETCBCorganization, there is a directorytfunder which you see directories2021,2017,c, etc. which contain TF feature files. In order to get these features, your module specifier isETCBC/bhsa/tf.Based on the string
{org}/{repo}/{path}it will find the online repository, check the latest release, find the zip file, download and expand it to your local~/text-fabric/data/{org}/{repo}/{path}If there are no releases, it will find the latest commit and use the data from there.
But you may go back in the history, see below.
- everywhere
- The extra data is accessible whether you work in a Jupyter notebook, or in the TF browser. The extra features are clearly listed after the incantation in a notebook, and they show up in the pretty displays in the TF browser. And when you export data from the TF browser, all data modules are reported in the provenance section.
Step by step
When you develop your own data features, you'll probably make many changes before you take the trouble of publishing them as a zip file attached to a release/ Here we describe the easiest workflow to work with your developing data with a view to share it much less often than you modify it.
Produce in your local GitHub / GitLab folder
You probably have a program or notebook that synthesizes a bunch of new features. It is a good idea to have that program in a version control system, and publish it on GitHub / GitLab, in a repository of your choice.
Set up that program in such a way, that your features end up in the same repository, in a folder of your choosing, but directly under a folder that corresponds with the version of the main data source against which you are building your data.
Currently, your features only live on your computer, in your local github folder.
You may or may not commit your local changes to the online GitHub / GitLab.
But you do not want to create a new release and attach your zipped feature data to it yet.
We use the existing annotation/banks/tf data as an example.
We assume you have this data locally, in
~/github/annotation/banks/tf
under which there are versions such as 0.2, which contain the actual .tf files.
We are going to develop the sim feature, in
~/github/annotation/banks/sim/tf
Test the features
When you want to load the new features, you can use
the mod parameter:
use("annotation/banks", mod=f"annotation/banks/sim/tf")
But TF then tries to download it from GitHub, or look it up from your
~/text-fabric-data.
Both will fail, especially when you let TF manage your ~/text-fabric-data directory.
You have to pass clone as the checkout option:
use("annotation/banks", mod=f"annotation/banks/sim/tf:clone")
The clone option means: use local data under ~/github.
With this set, TF looks in the right place inside your ~/github directory.
It will not go online, and not look into ~/text-fabric-data.
Commit and push your features
When the time comes to share your new feature data, everything is already in place to do that.
Write access
You can only do the following steps for repositories for which you have write access,
so do not try to perform this on annotation/banks but use a repo of your own.
On the command-line, go to the directory of your repository, and say
git add --all .
git commit -m "data update or whatever"
git push origin master
and then your data is shared in the most basic way possible. But very effectively.
From now on, other users (and you too) can use that data by passing just the switch
use("annotation/banks", mod=f"annotation/banks/sim/tf")
without the clone option.
If you do this, you get a freshly downloaded copy of your features in
your ~/text-fabric-data directory.
And every time you do this again, the downloaded data is ready to use.
If you want to make sure that you have the most recent stable release of that data,
you may say
use("annotation/banks", mod=f"annotation/banks/sim/tf:latest")
and then check for updates will be performed and if there is a newer release, it will be downloaded.
Make a release
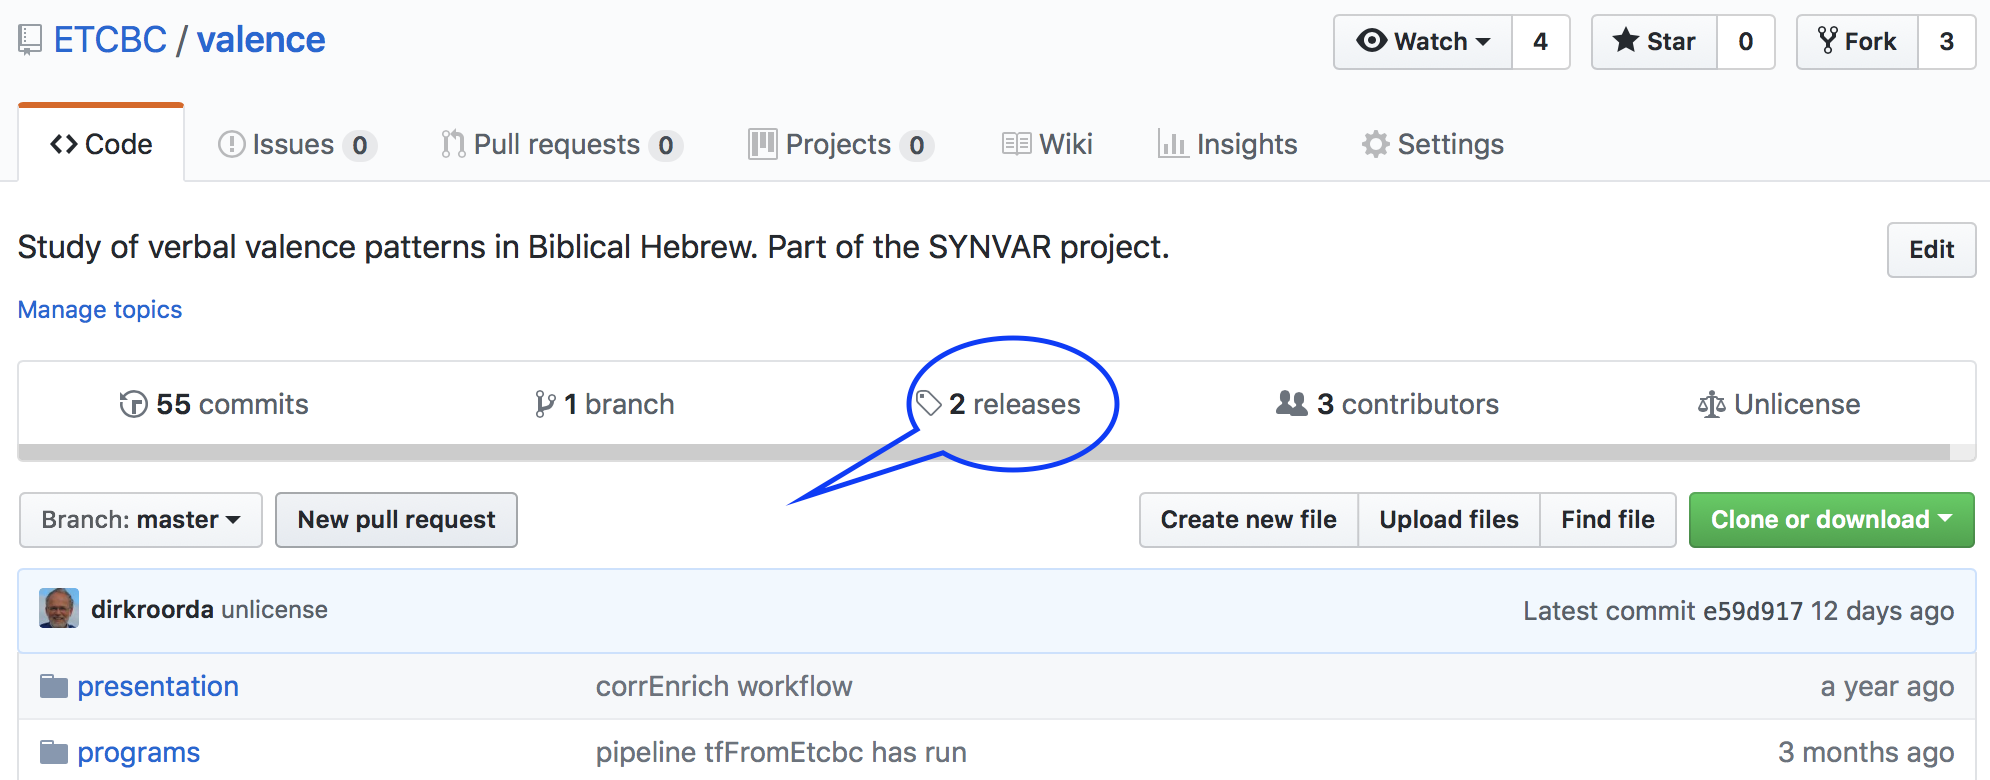
If you want to single out a certain commit as stable data and give it a version number, go to your repo on GitHub, click the releases link, and make a new release.
If your repo is on GitLab, it may be a bit more difficult to make a release. Follow the instructions found on GitLab.
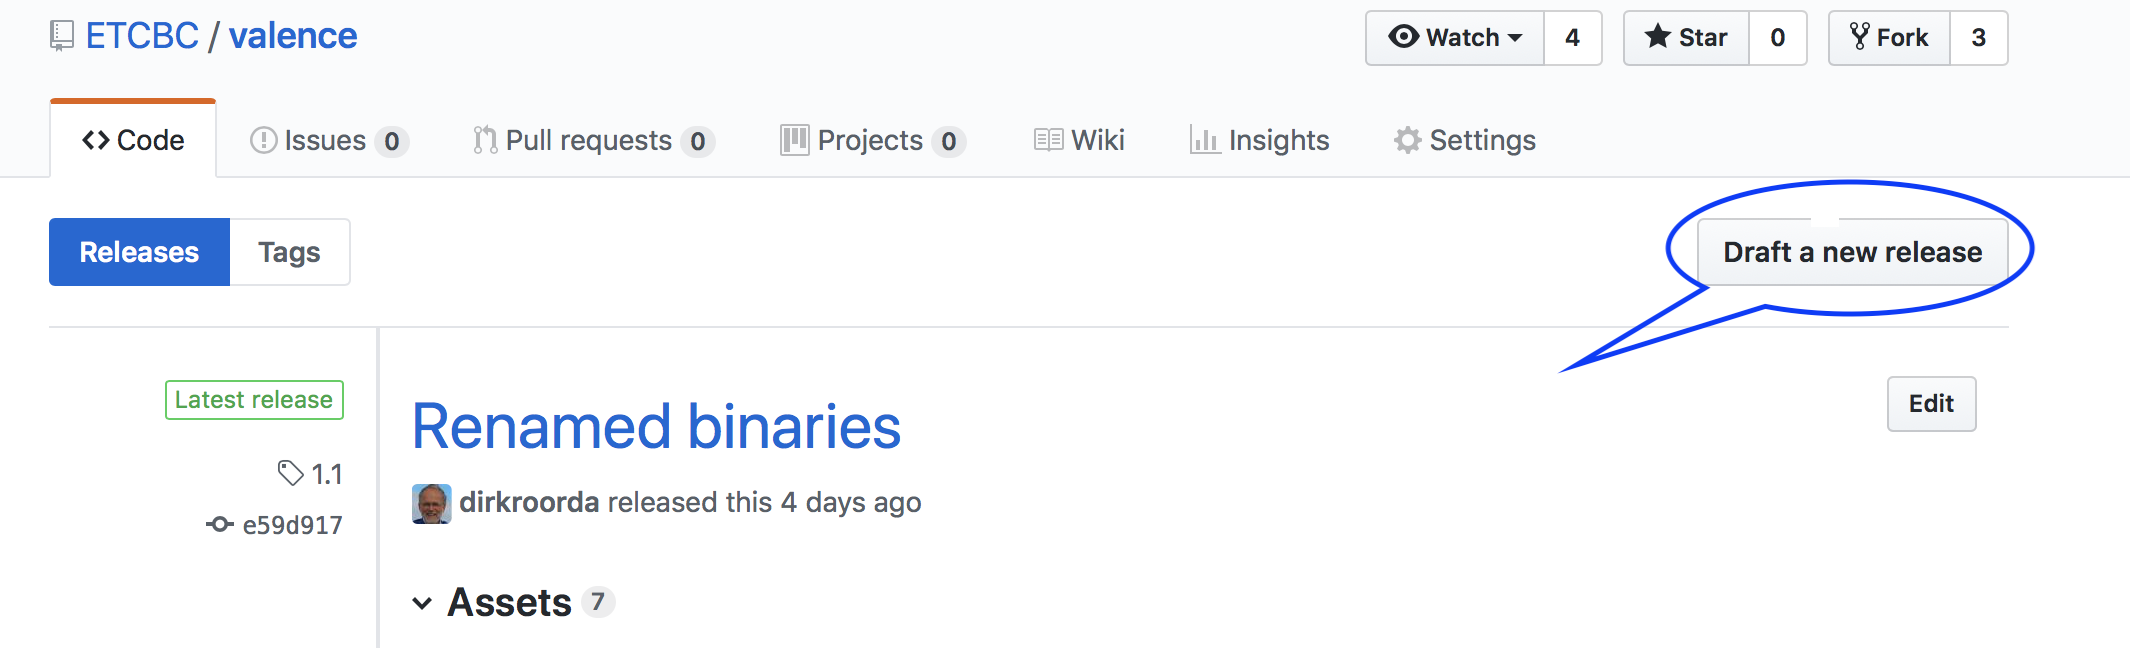
Then click Draft a new release
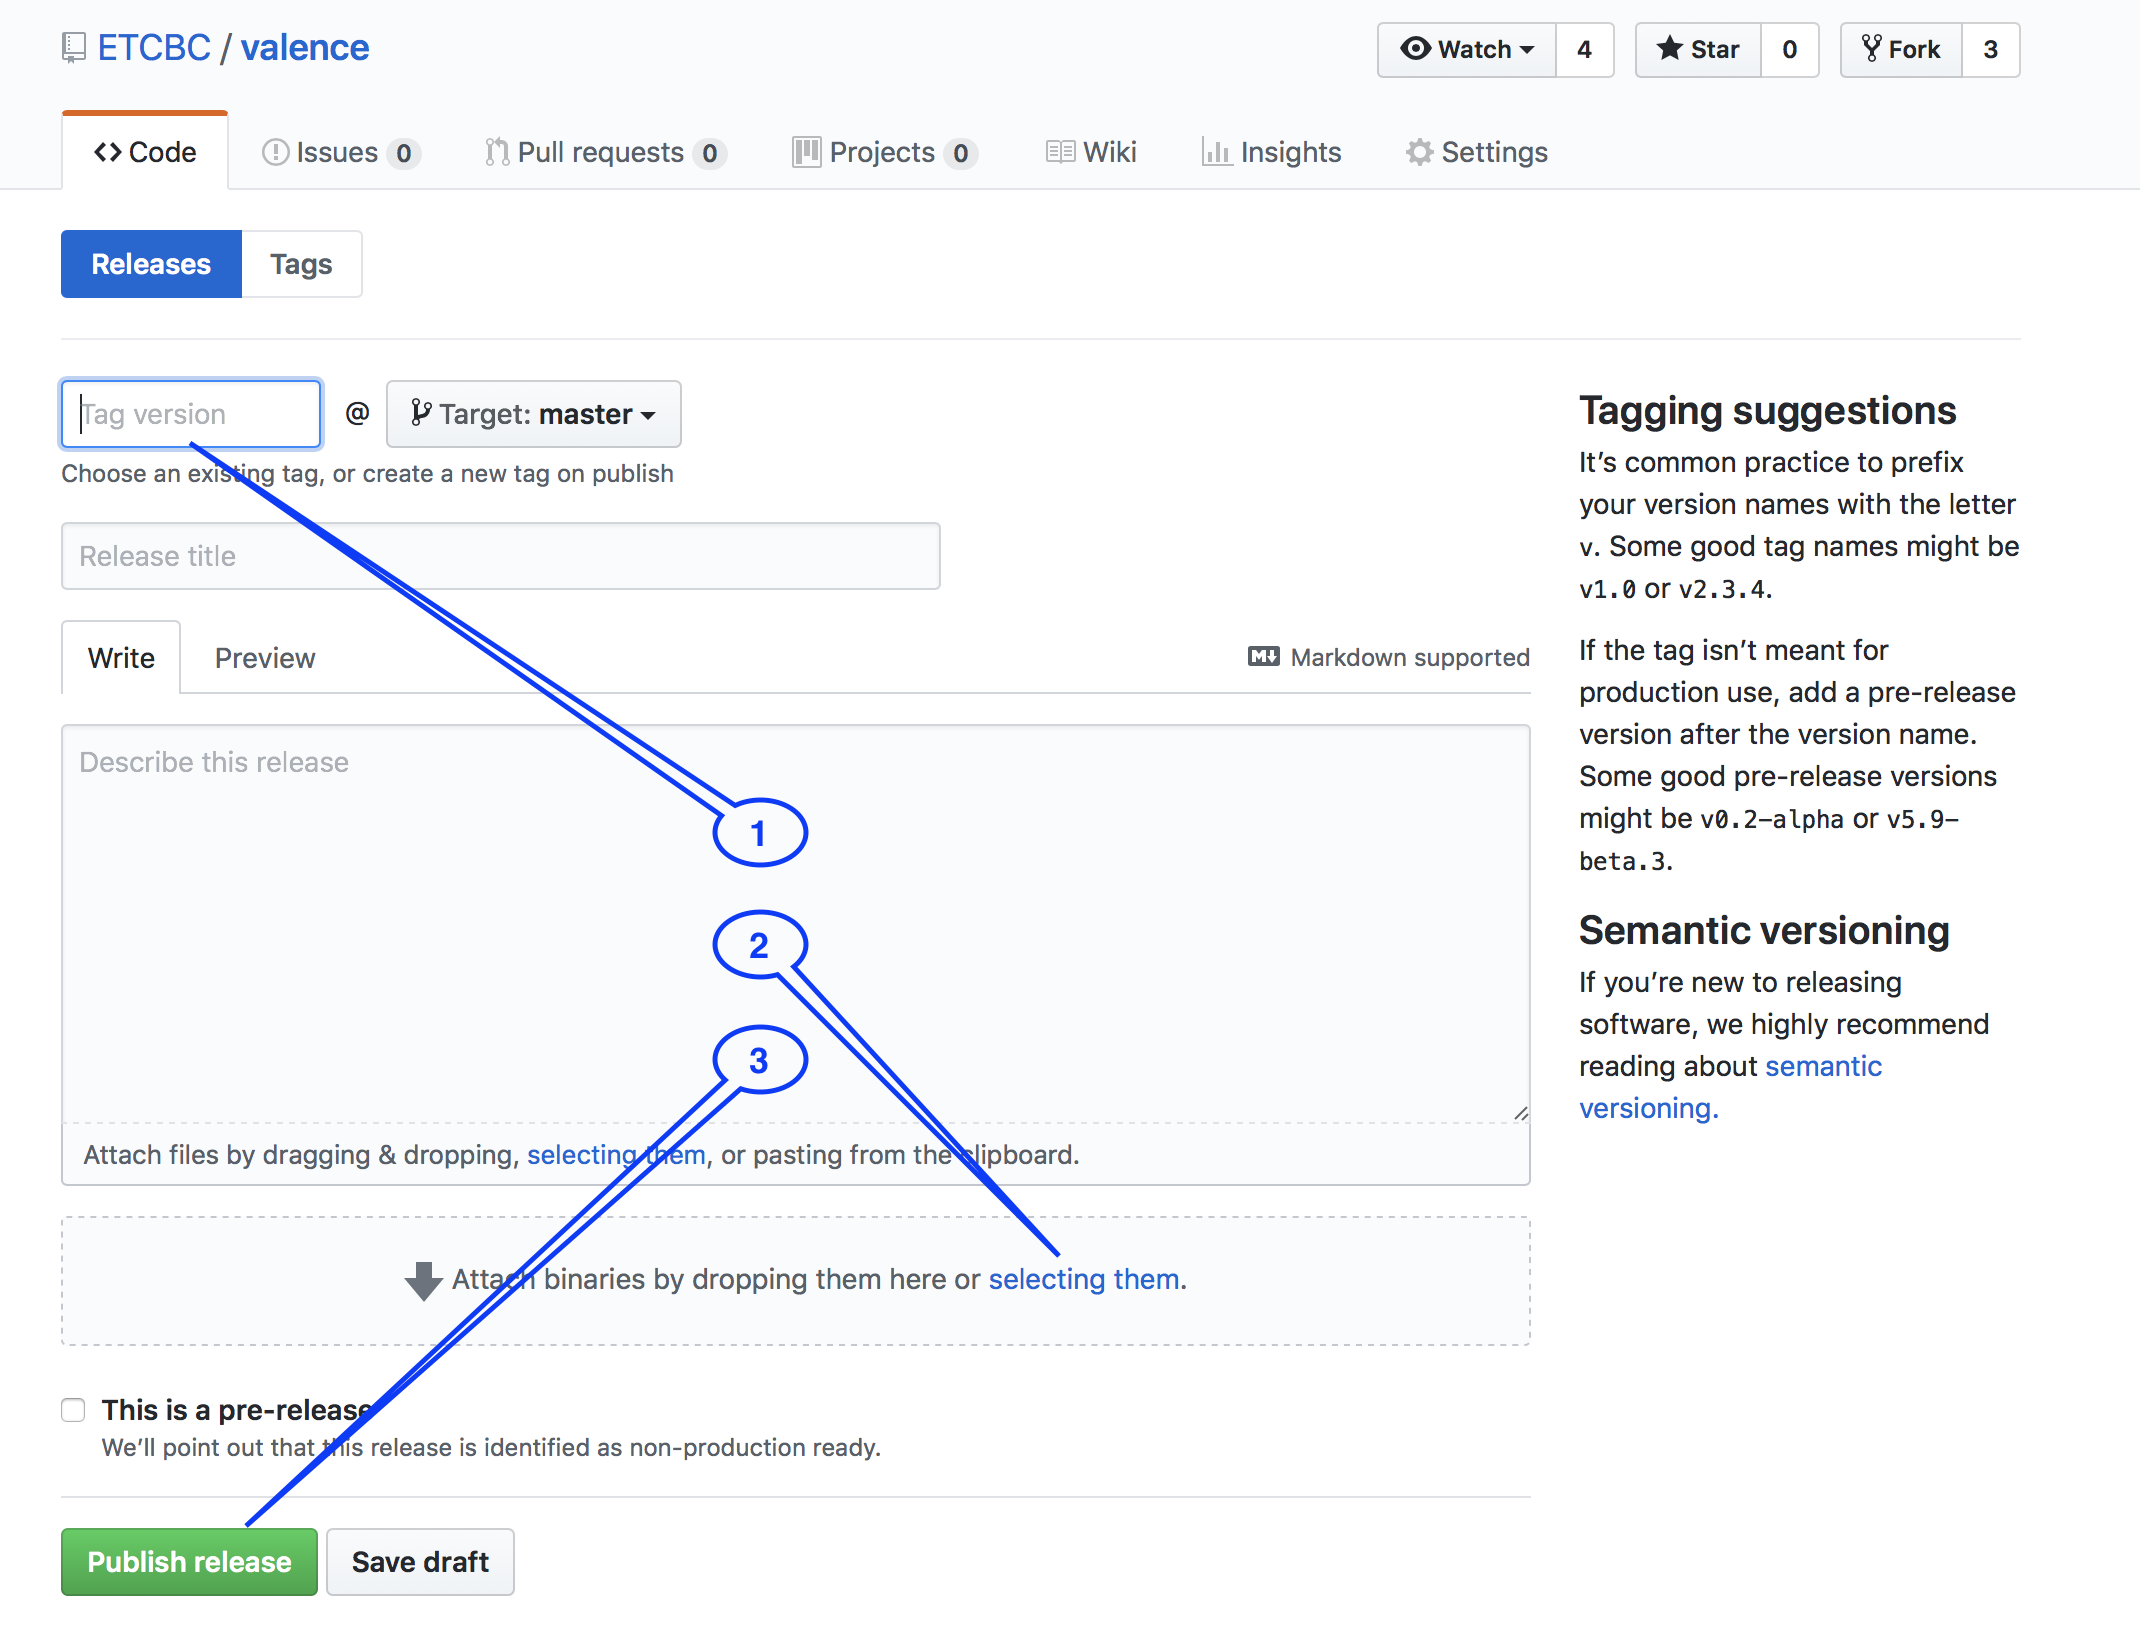
Fill in the details, especially the release version (something like 0.2, or v0.2),
although nothing in the workflow depends on the exact form of the version number;
you will see the release version in the provenance, though.
Click the button Publish release.
Now your data is available to others.
The users of your data can refer to that copy by means of the version number:
use("annotation/banks", mod=f"annotation/banks/sim/tf:0.2")
Package into zip files
If you share many features, or a whole TF dataset, it is more economical to zip that data and attach it as a binary to the release.
It is vitally important for the TF workflows that that zip file has the right name and the right structure.
TF comes with a command to create that zip file for you.
Execute the following command in your terminal:
tf-zip annotation/banks/tf
You'll see
Create release data for annotation/banks/tf
Found 2 versions
zip files end up in /Users/dirk/Downloads/annotation-release/banks
zipping annotation/banks           0.1 with  10 features ==> tf-0.1.zip
zipping annotation/banks           0.2 with  10 features ==> tf-0.2.zip
and as a result you have this in your Downloads folder
~/Downloads/github/annotation-release/banks:
  tf-0.1.zip
  tf-0.2.zip
Attach these versions, or just the newest version, to the release and publish the release.
Zip your data with the tf-zip command as explained above.
It will look into your local github directory, pickup the features from there,
zip them, and put the zip files in your Downloads folder. Then you can pick
that zip file up and attach it manually to a new release of your repository
on the online GitHub / GitLab.
Continue developing your features
Probably you'll make changes to your features after having published them.
Then you have the cutting edge version of your features in your local github
directory, and the published version in your ~/text-fabric-data directory.
When you make new commits, users that call up your data in the standard way, will still get the latest stable release.
But users that say
use("annotation/banks", mod=f"annotation/banks/sim/tf:hot")
will get your cutting edge latest commit.
Use data
Now we are just reading data, so the following steps you can perform literally, without fear of overwriting data.
Check it out!
When calling up data and a corpus app, you can go back in history:
to previous releases and previous commits, using a checkout parameter.
You have already seen it, and here we spell them out in greater detail.
You can specify the checkout parameter separately for
- the corpus app code (so you can go back to previous instantiations of the corpus app)
- the main data of the app plus its standard data modules
- every data-module that you include by means of the
--mod=parameter.
The values of the checkout parameters tell you to use data that is:
clone: locally present under~/githubin the appropriate placelocal: locally present under~/text-fabric-datain the appropriate placelatest: from the latest online releasehot: from the latest online commit"": (default): from your local copy, but if there is no local copy, from the latest online release, or if there are no releases, from the latest online commit2387abc78f9de…: a concrete commit hash found on GitHub / GitLab (under Commits)v1.3: a release tag found on GitHub / GitLab (under Releases)
You pass the checkout values as follows:
- For the corpus app:
after the app name:
bhsa:clone,oldbabylonian:local,quran. If you leave it out, it defaults to the empty string: local copy or latest release or commit. - For the main data and standard data modules of the app:
in the
checkoutparameter:checkout="clone",checkout="local",checkout="". If you omitcheckoutout, it defaults to the empty string: latest release or commit. If you need a different checkout specifier for the main data and the standard modules, you can pass the standard modules explicitly to themod=parameter of theuse()command and give them the specifiers you need. - For the data that you call up as a module:
after the module name:
annotation/banks/sim/tf:clone,annotation/banks/sim/tf:local,annotation/banks/sim/tf. If you leave it out, it defaults to the empty string: latest release or commit.
The checkout parameter can be used in the use() function when you call up
TF in a program (or notebook) and when you call up the TF browser on the command-line:
(in a program)
use("annotation/banks:clone", checkout="latest", mod="annotation/banks/sim/tf:hot")
(on the command-line)
tf banks:clone --checkout=latest --mod=annotation/banks/sim/tf:hot
Note that you can pass different specifiers for the distinct portions of data and code that you want to use.
To see it in action, consult the repo notebook.
More about using data modules
Suppose you have called up a data module:
(in a program)
A = use("annotation/banks", mod="annotation/banks/sim/tf")
(on the command-line)
tf banks --mod=annotation/banks/sim/tf
You can then use the features of the module in everywhere.
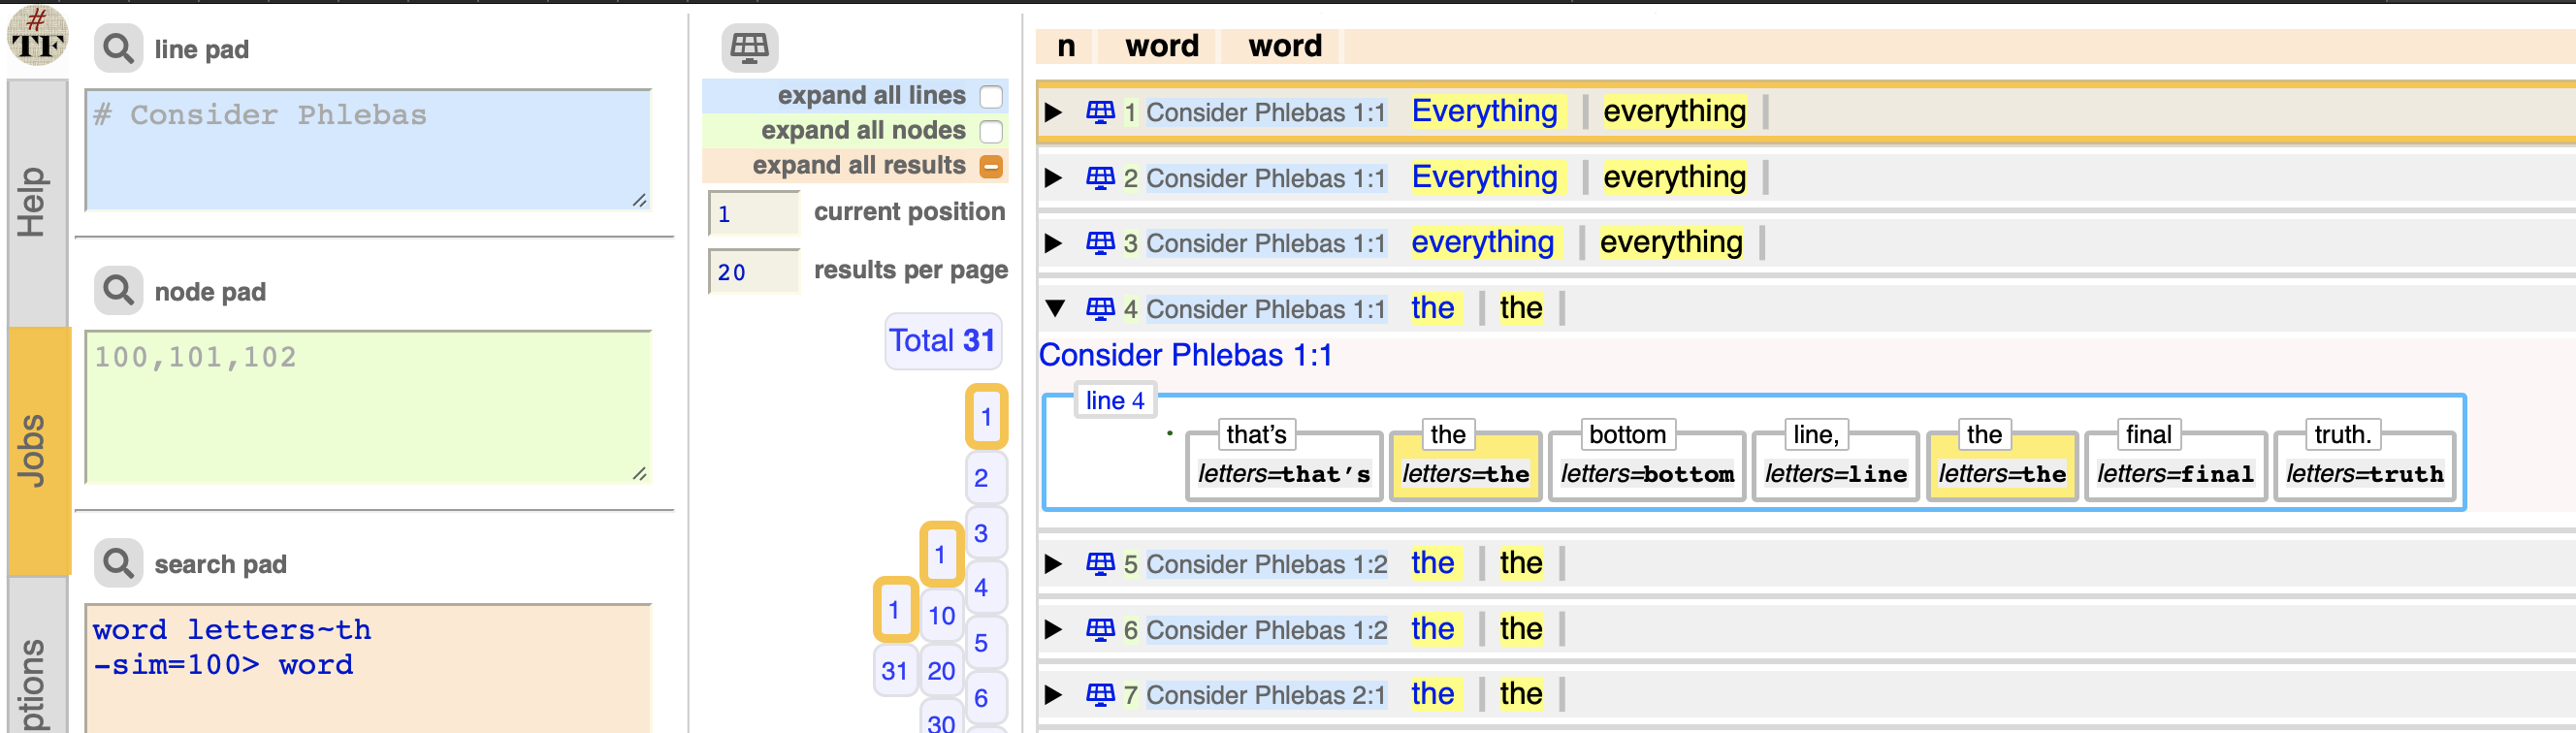
Fill out this query:
word letters~th
-sim=100> word
and expand a result:
The display looks like this:
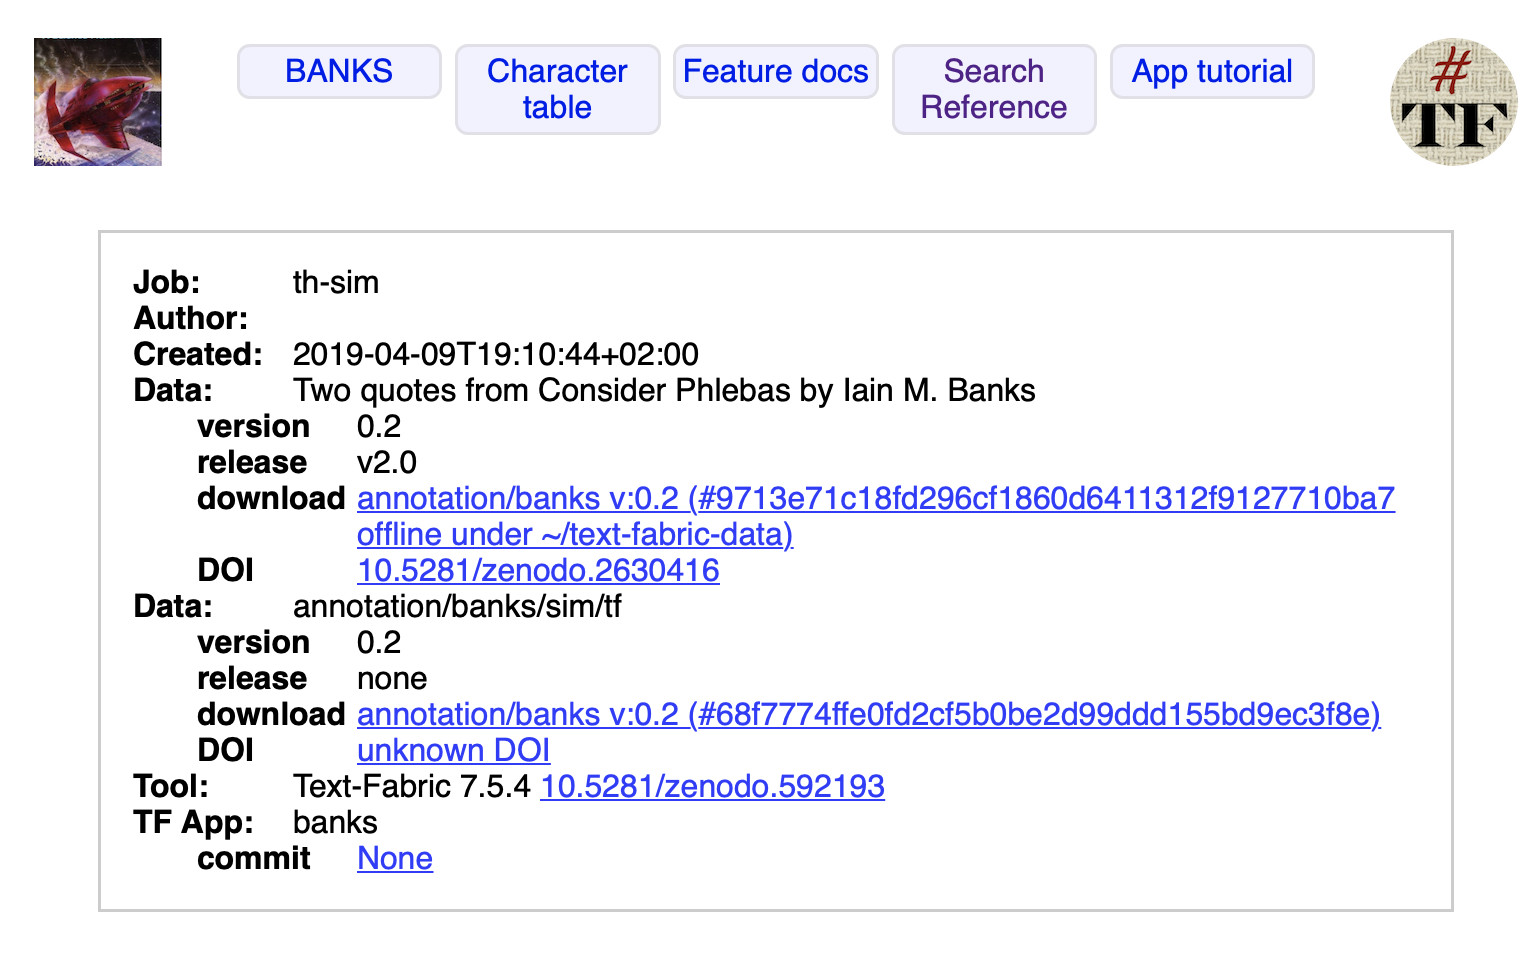
And if you export the data, the extra module is listed in the provenance.
More modules at the same time
Now that we get the hang of it, we would like to use multiple modules added to a main data source.